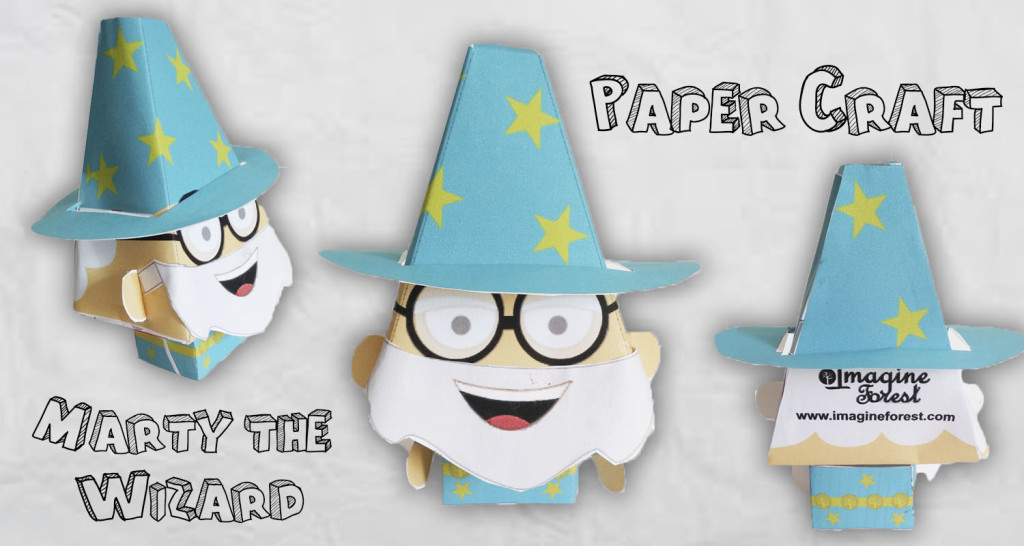
Easy Paper Craft Wizard Tutorial
Today I am going to show you how to make a paper craft wizard. In particular a paper craft version of me, Marty the great wizard of Imagine Forest! To help you out, I have created a template for you to download and print out. Now let’s begin the tutorial:
What you will need:
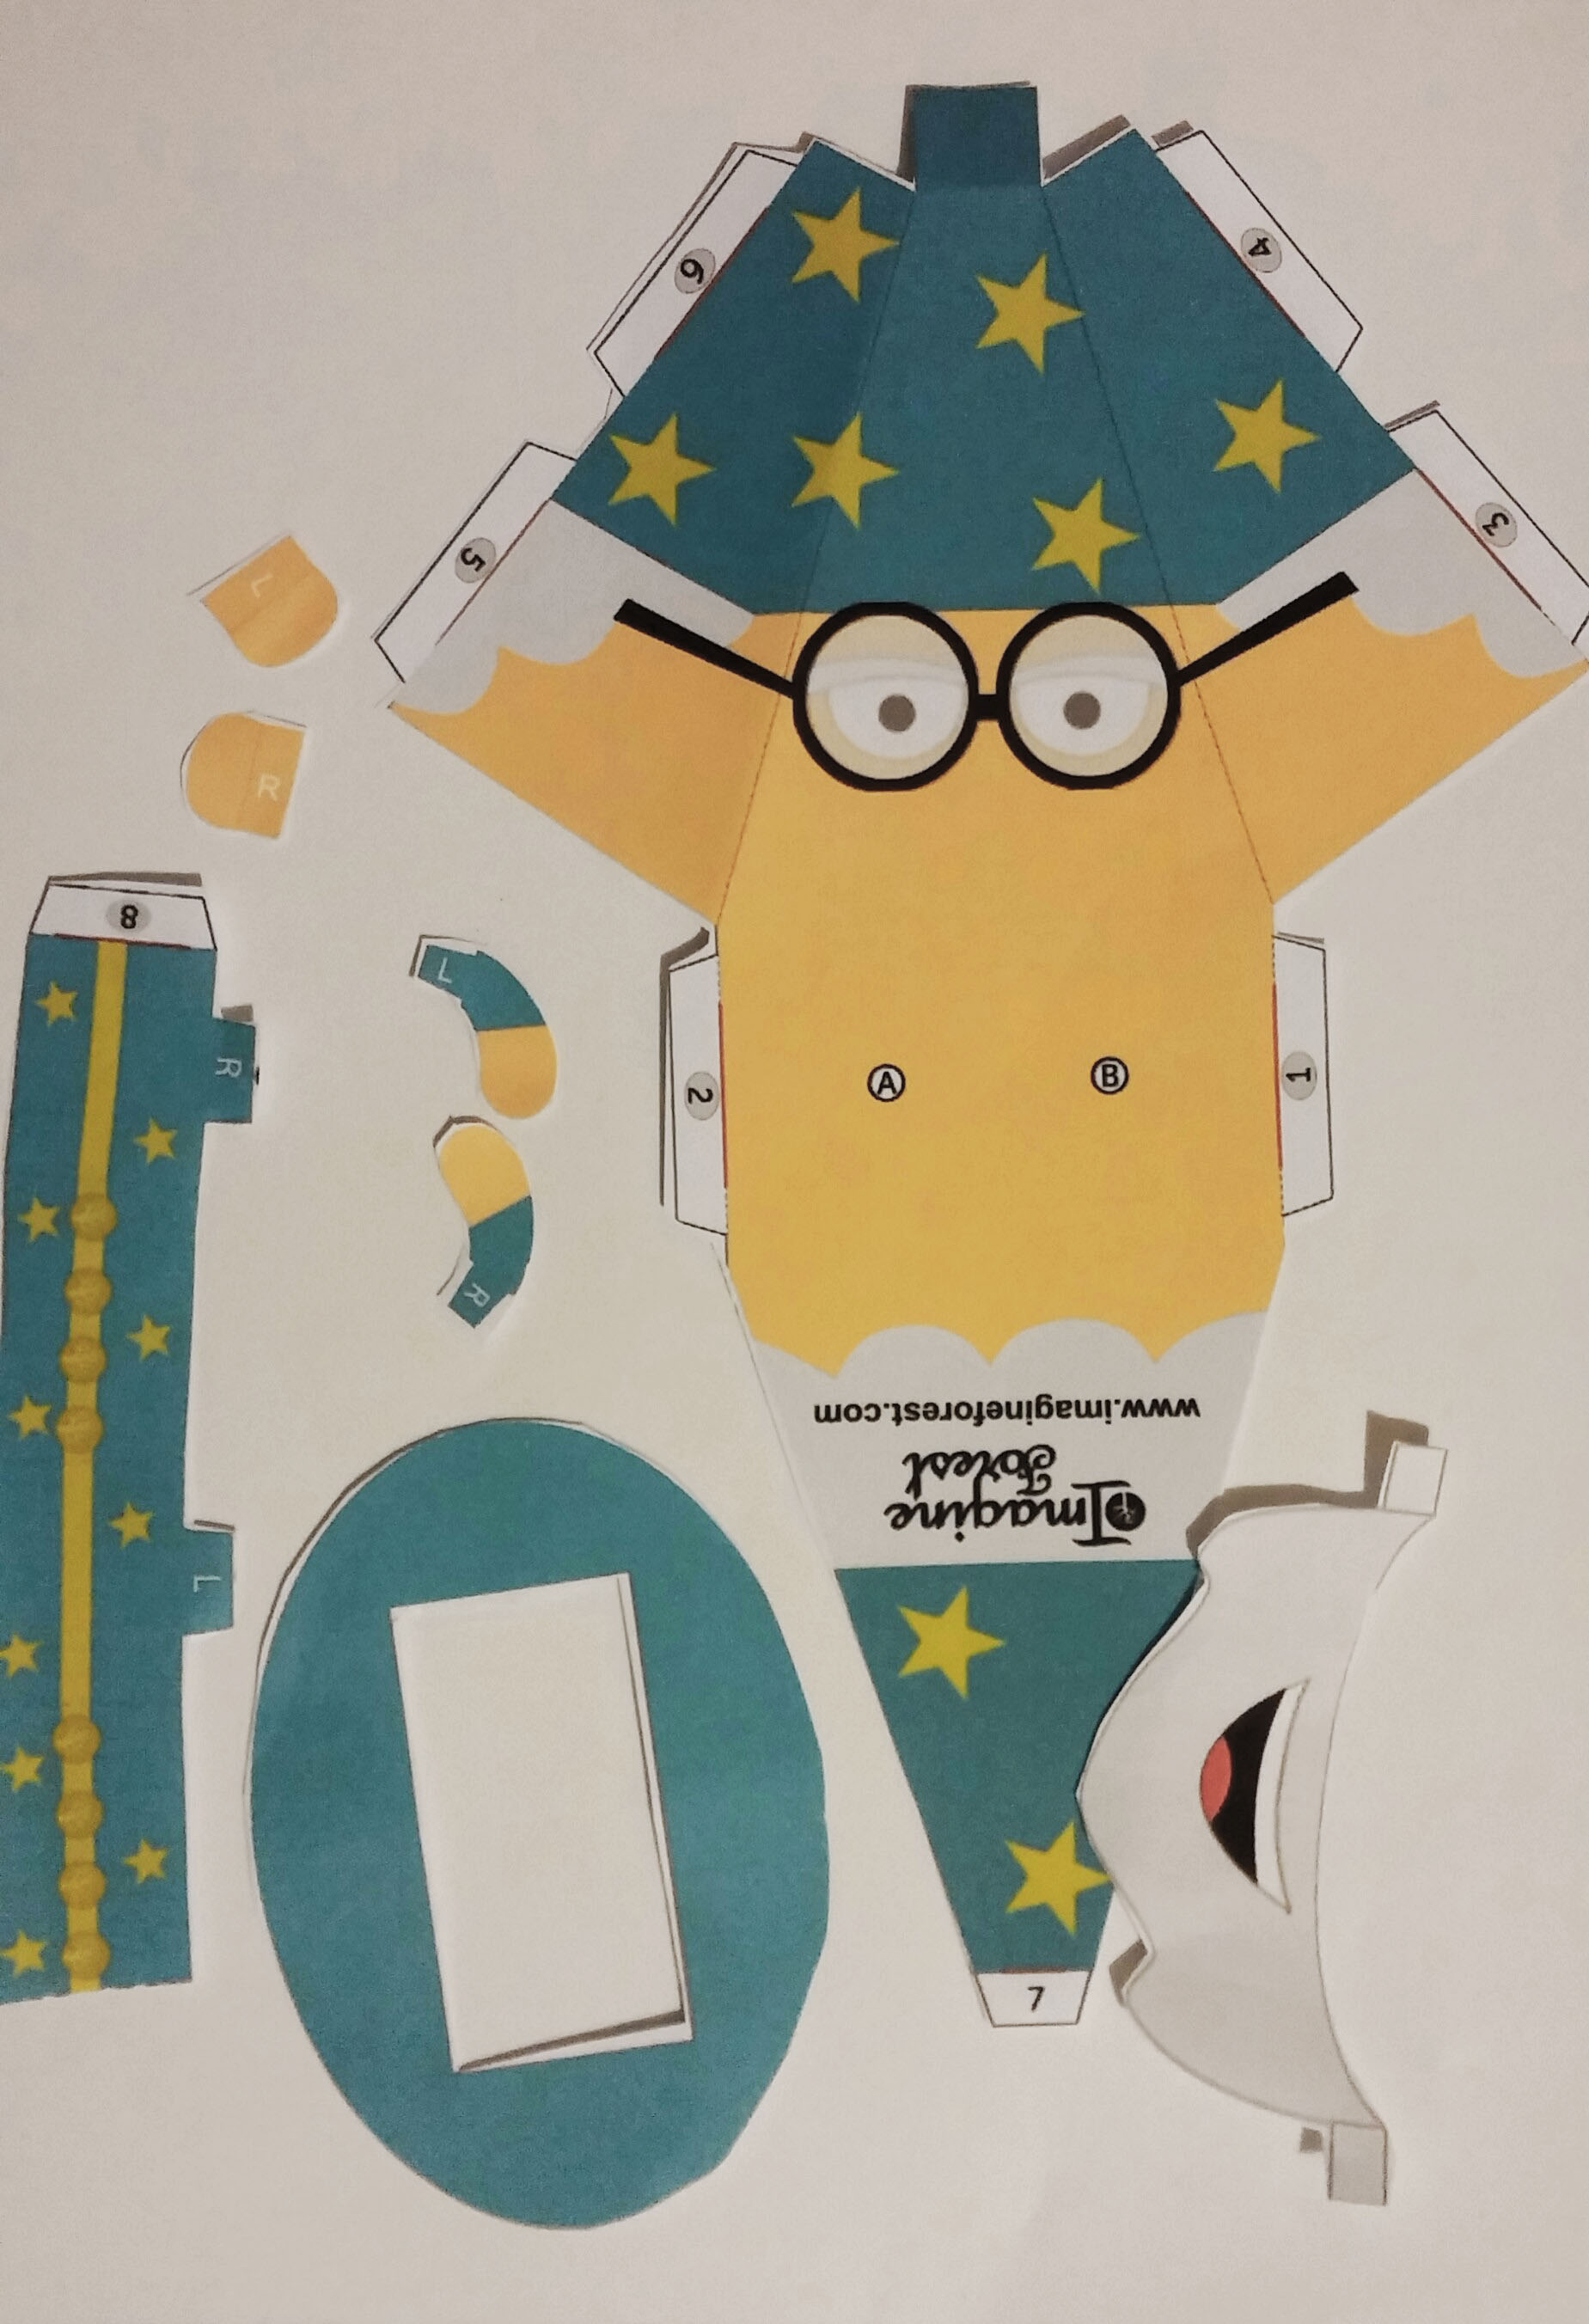
- Paper Craft wizard template
- Thick plain printing paper
- Scissors
- Glue
Step 1: Download the paper craft wizard template and print it out on thick plain paper. Then cut out each of the individual parts using scissors (Please ask an adult to help you out here).
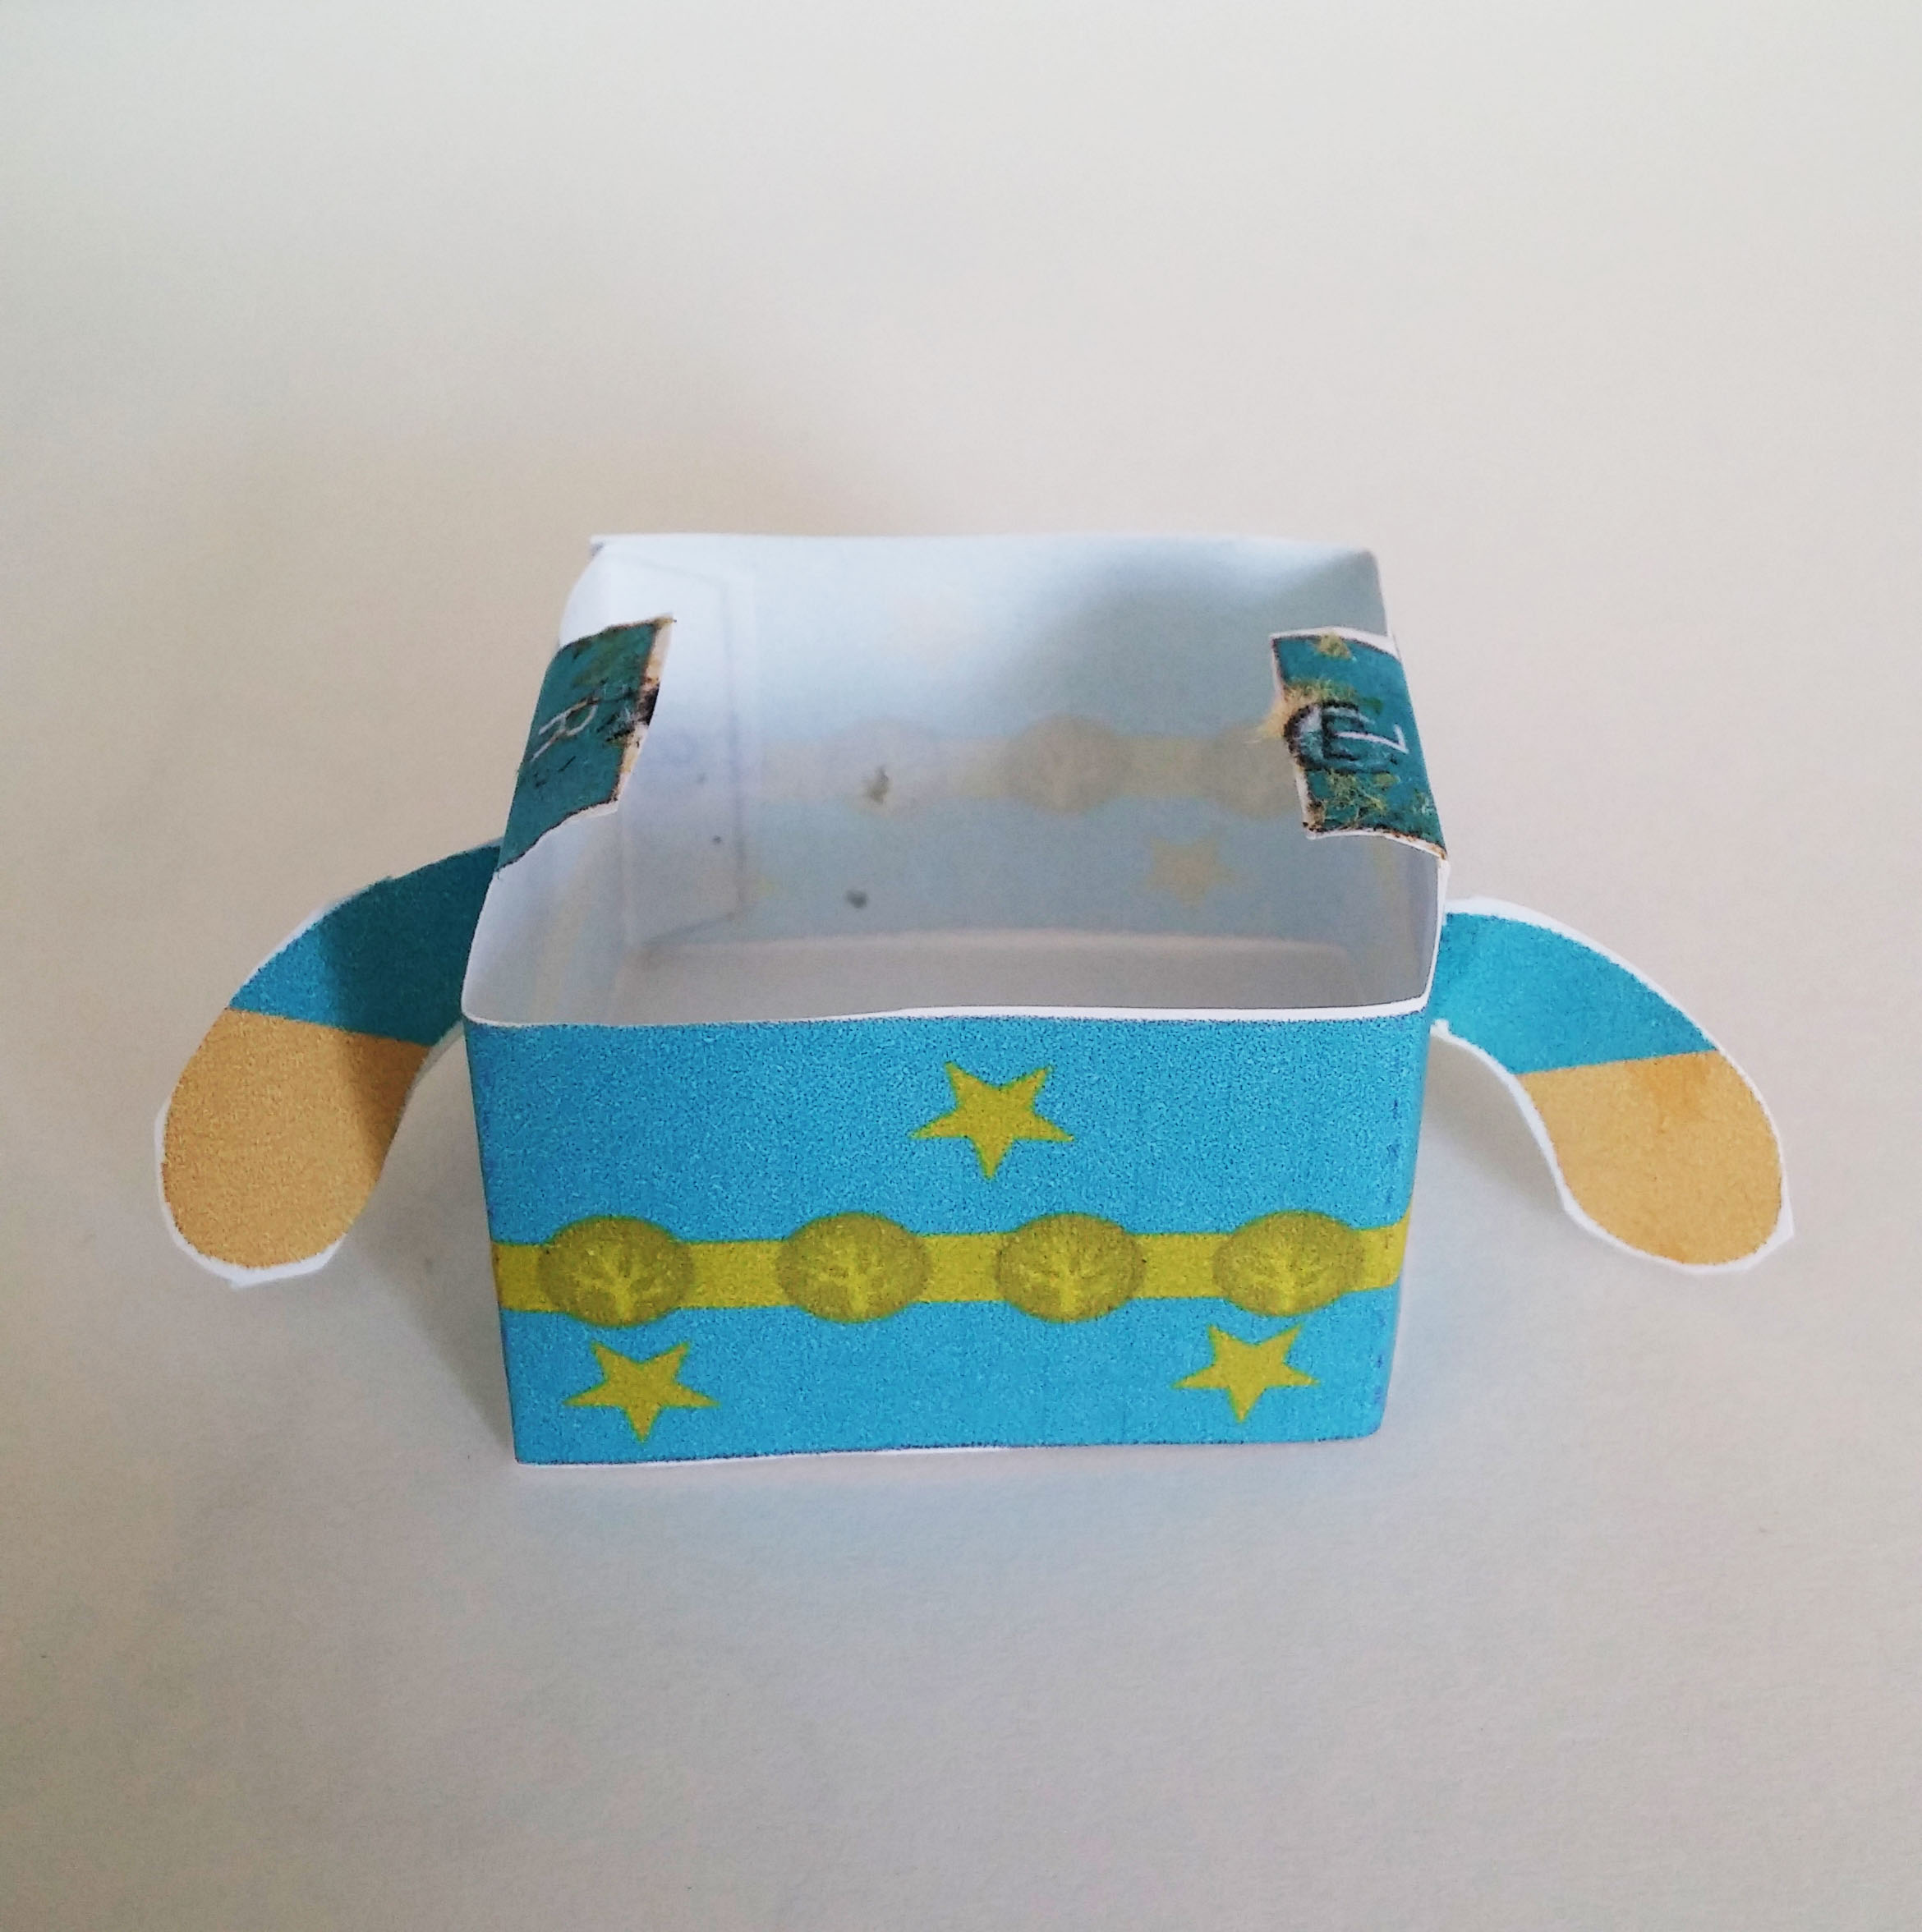
Step 2: Next, fold the flaps as shown on the template and stick the arms to the body using some glue (see image).
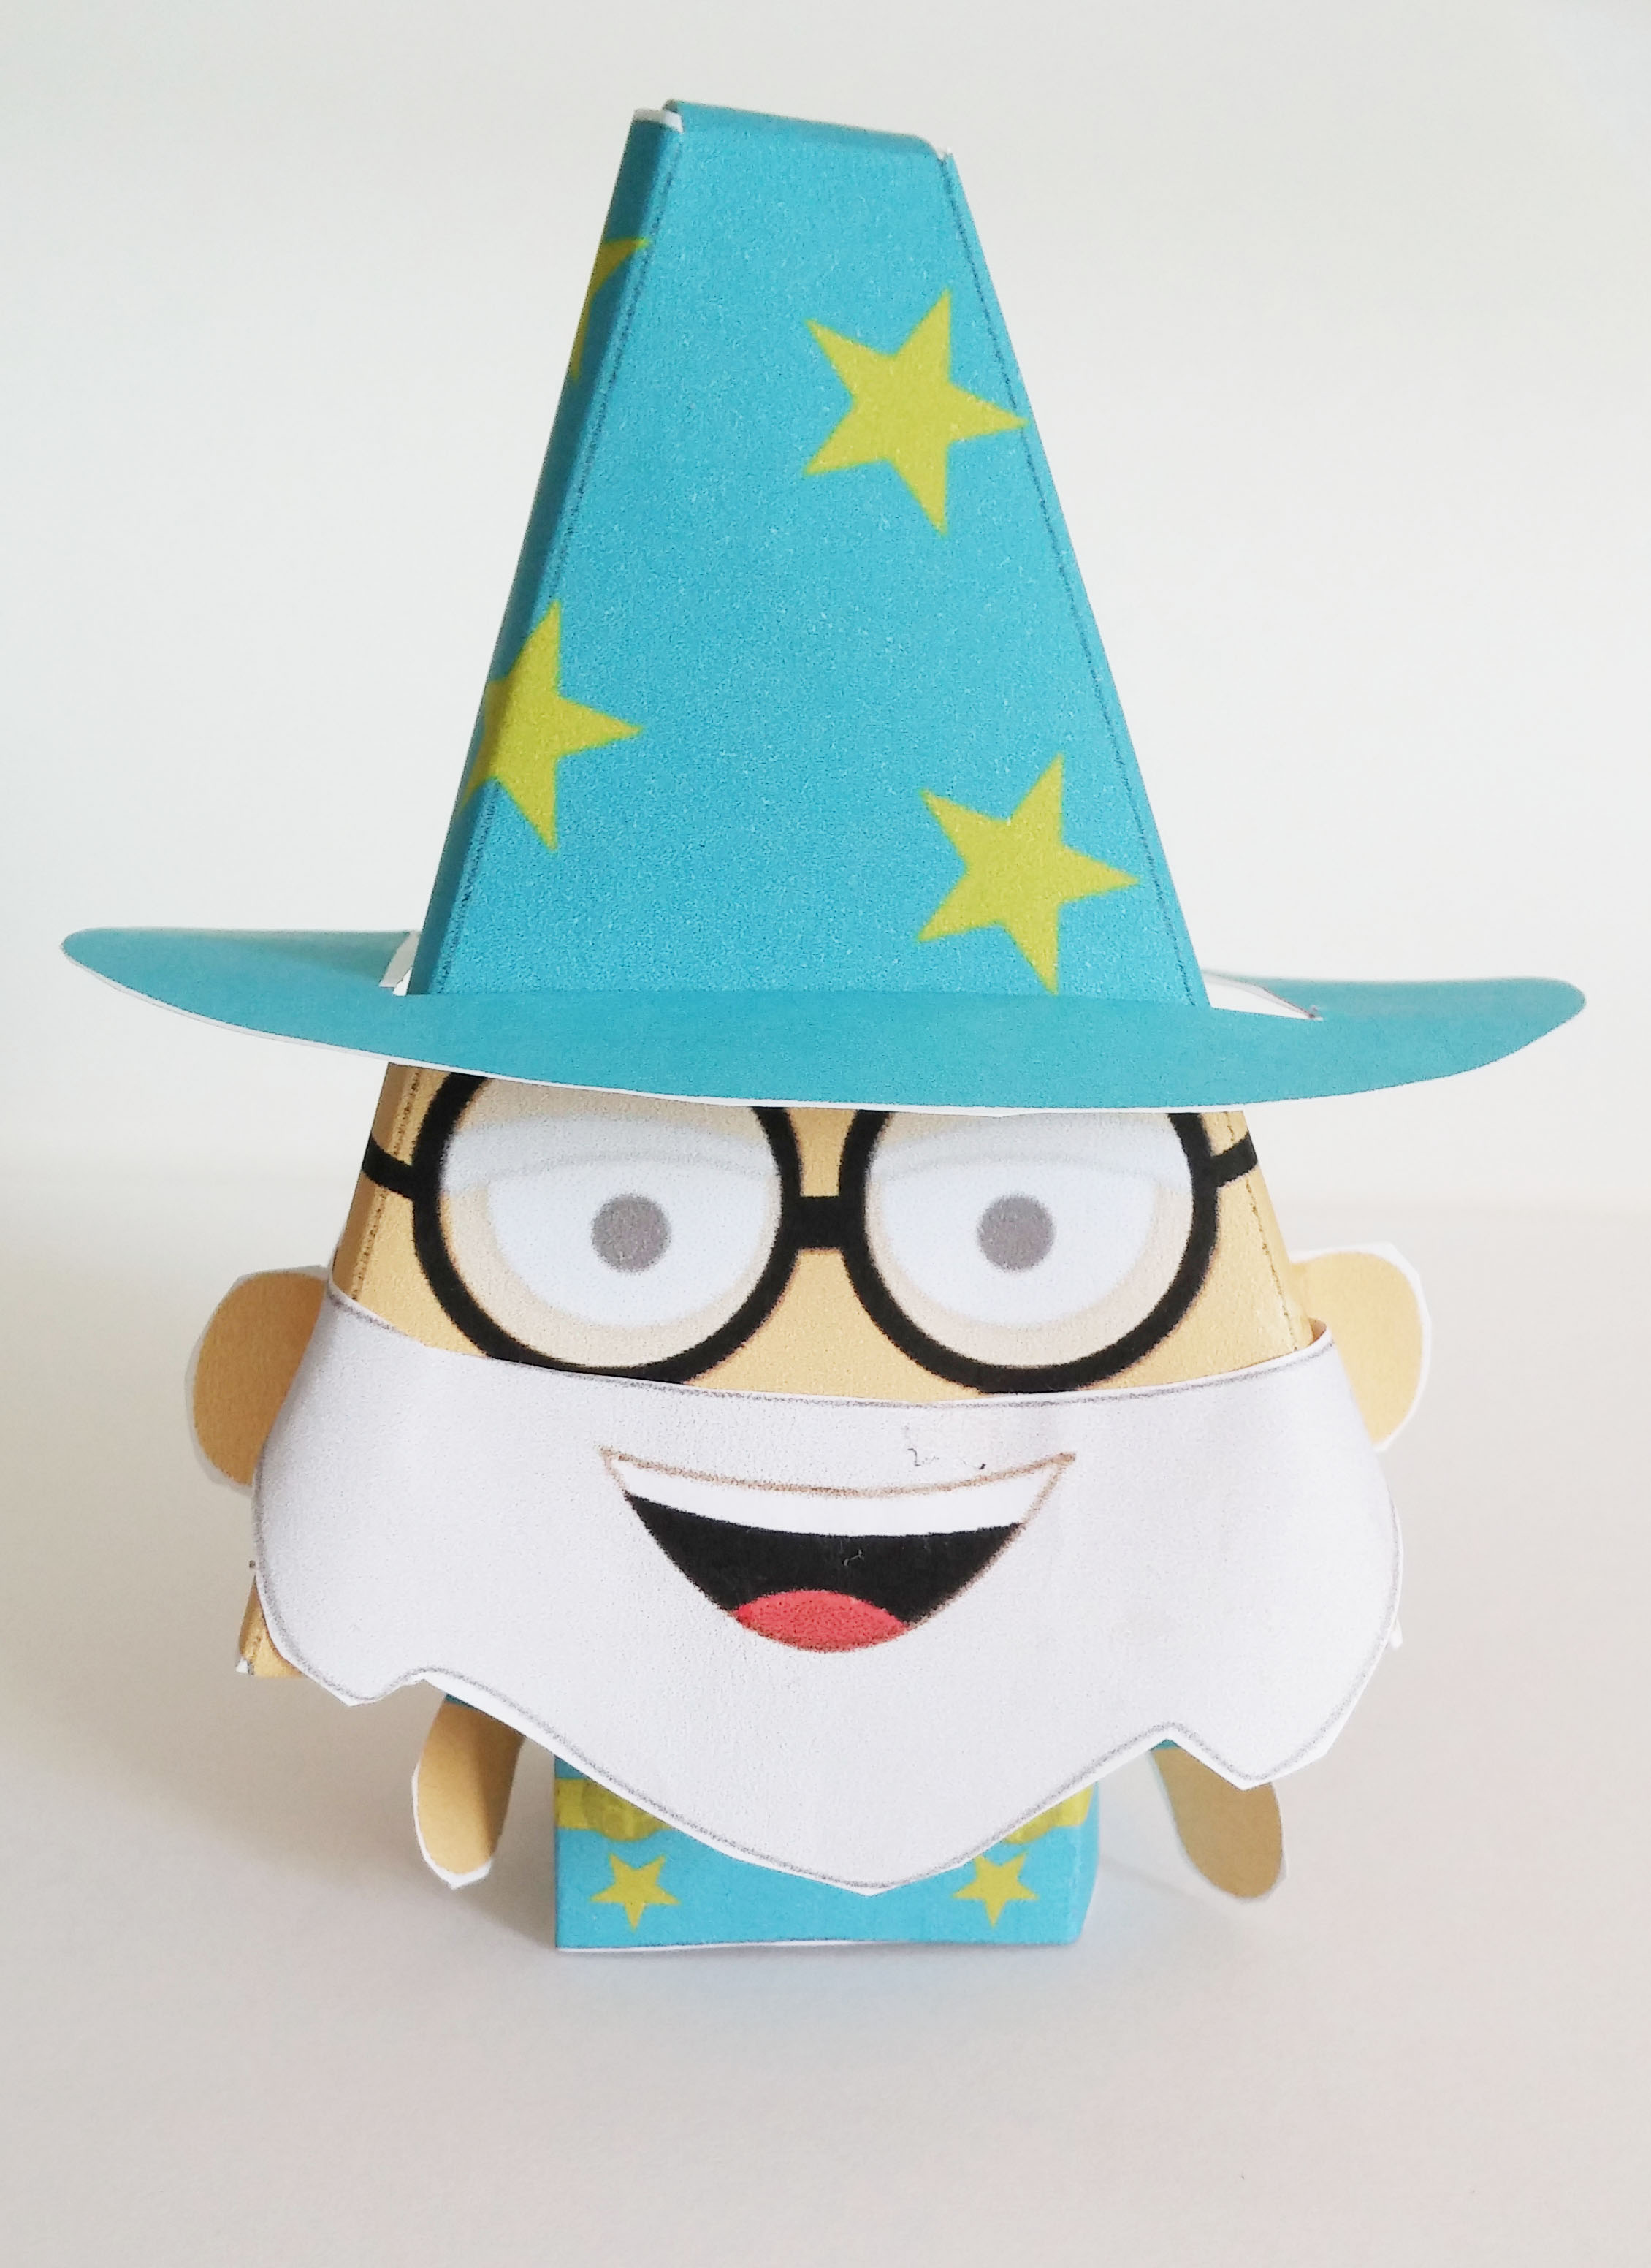
Step 3: Now stick together Marty’s head, sticking on the ears and the beard (see image). One handy tip is to stick the top of the hat last, so you can use a pencil to stick the hat together from the inside.

Step 4: Finally attach the head and body together with more glue and you’re done making your own paper craft wizard!
Keep an eye on my Pinterest for more paper craft characters for you to download and print! You can also sign-up to our newsletter for more exclusive freebies and paper crafts. See you next time!


Comments loading...