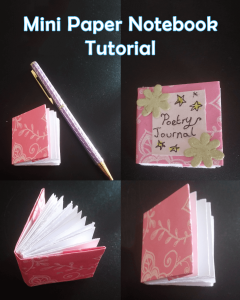
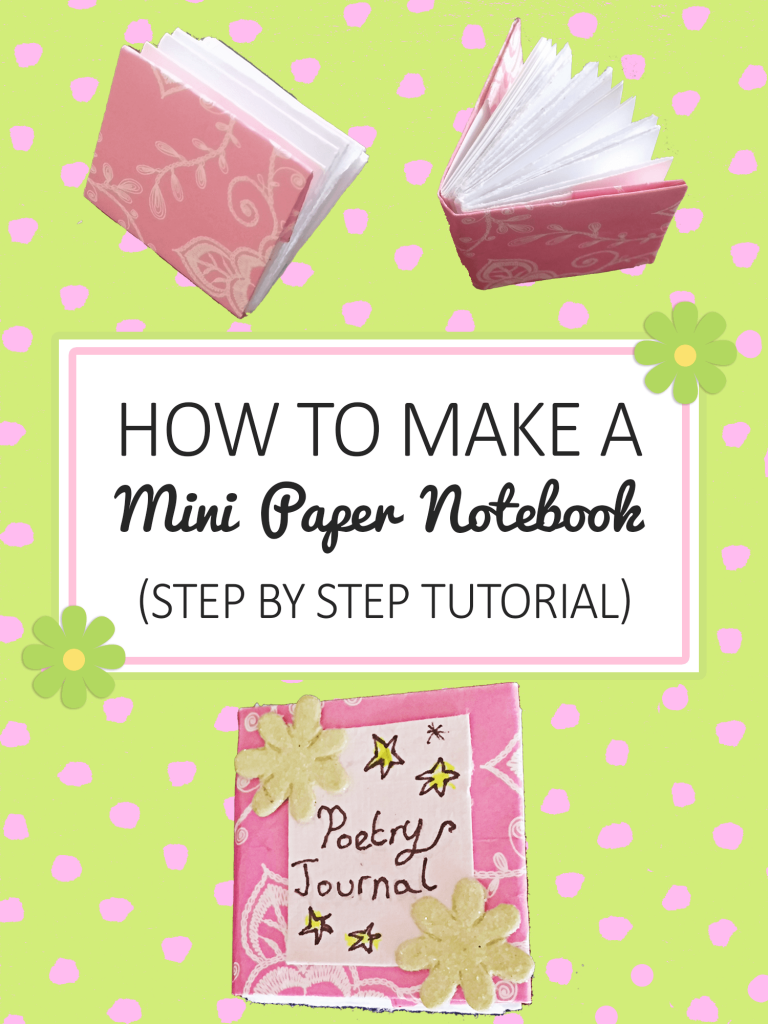
How to Make a Mini Paper Notebook Tutorial
There’s nothing better than a DIY mini notebook. Or maybe there is? How about an easy mini notebook from one sheet of paper! Kids love to carry miniature things around. Whether these are toys or pieces of leftover food. To get kids writing on the go, why not create these super easy mini notebooks. Not only are they super small (perfect for any coat or trouser pocket), but they are practical too! One way to encourage kids to write daily is to get them to keep a journal, this could be an ideas journal, a poetry journal or even a book of little drawings! Follow our simple instructions below to learn how to make mini notebooks!
Mini Paper Notebook Tutorial:
What you will need:
1 plain white a4 paper
1 coloured or patterned paper for the notebook cover (15cm x 8cm)
Glue Stick
Scissors
Step 1:
Cut your A4 paper equally into 5 strips. Each strip sized 30x4cm:

Step 2:
Fold each of your strips equally into an accordion shape, creating 8 equal sections. To create an accordion shape, fold your sheet of paper in half 3 times and then unfold. You should get 8 equal sections, use these creases to create the accordion shape pictured below:

Step 3:
Glue each of the 5 accordions, so they look like mini books:

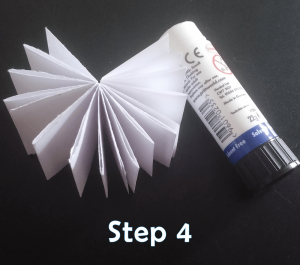
Step 4:
Glue all 5 mini books together to make a master mini notebook:
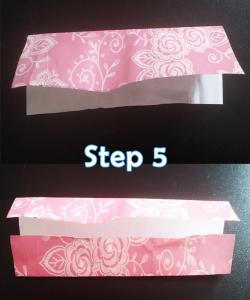
Step 5:
Now it’s time to make your mini notebooks cover! Fold your coloured paper in half (patterned side down), then unfold it. Then fold it in half again, so you have 4 folded sections:
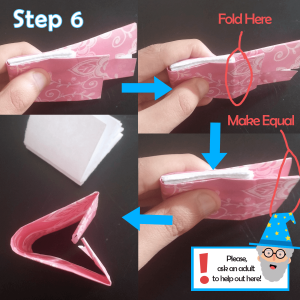
Step 6:
Wrap your coloured notebook cover around your white pages and fold the ends inwards to create a crease. Cut off any excess coloured paper to make both sides equal:
Step 7:
Next, slot the first page of your mini notebook into the folds of the coloured paper. Do the same for the other side:

Step 8:
Ta Da! Your mini notebook should now look like an actual notebook! You can glue the inside pages to the cover to make it more sturdy. And don’t forget to personalise your front cover with all your favourite things:
5 Ideas for your Mini Notebooks:
1. Write down your haiku poems.
2. Write your own mini story.
3. Draw pictures of your favourite animals.
4. Write about your favourite food with pictures.
5. Create a collection of mini fairy tale books.
What are you going to do with your mini notebook? Share your ideas in the comments below!
Made a Mini Paper Notebook?
Share your mini notebook pictures in the comments below or using the hashtag #imagineforest on Twitter.
Did you have any issues when making your notebook? Let us know in the comments below or email info(at)imagineforest.com.


Comments loading...